
Overview
This guide will provide everything needed for a User to register and begin their new voicemail account provided by Platform28. When notified of account creation, the account will need to be registered in order to begin using the system.
Account Registration
Follow the steps below to register a new account. If issues are experienced, contact the system administrator for assistance.
- Navigate to www.gavoicemail.com
- Click on Register New Account

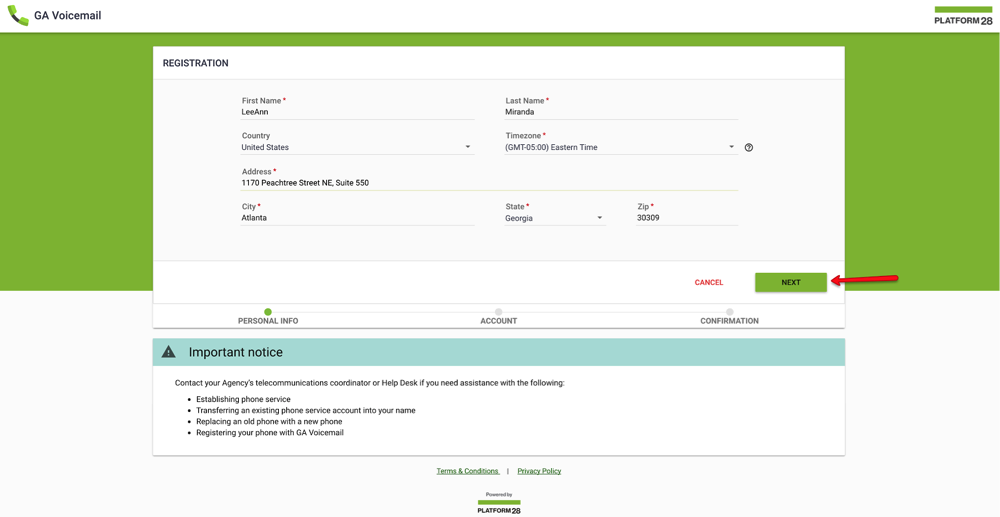
- Enter the requested information
- First Name
- Last Name
- Country
- Timezone
- Address
- City
- State
- Zip Code
- Click Next
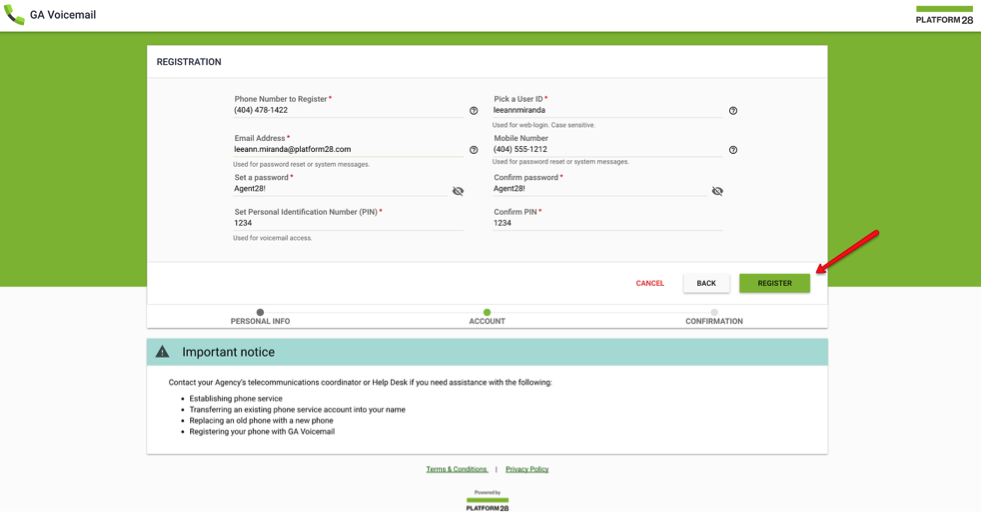
- Enter the requested information
- Phone Number to Register
- This will generally be the desk phone number. If unsure of which number is associated with the account, please contact the system administrator.
- Pick a User ID
- Choose a User ID that will be easy to remember. The User ID cannot be changed once the account has been activated. The User ID is case sensitive.
- Email Address
- The assigned email address
- Mobile Number
- Cell Phone number
- Set a Password
- Enter a password. The password is case sensitive and should adhere to the following requirements:
- Minimum of eight (8) Character
- Must contain at least three (3) of the following: Uppercase, lowercase, number, or special character.
- Enter a password. The password is case sensitive and should adhere to the following requirements:
- Confirm Password
- Re-Enter the chosen password
- Set Personal Identification Number (PIN)
- Enter a minimum of four (4) and a maximum of ten (10) digits which will be the password used for voicemail access via telephone
- Confirm PIN
- Re-Enter the chosen PIN
- Phone Number to Register
- Click Register
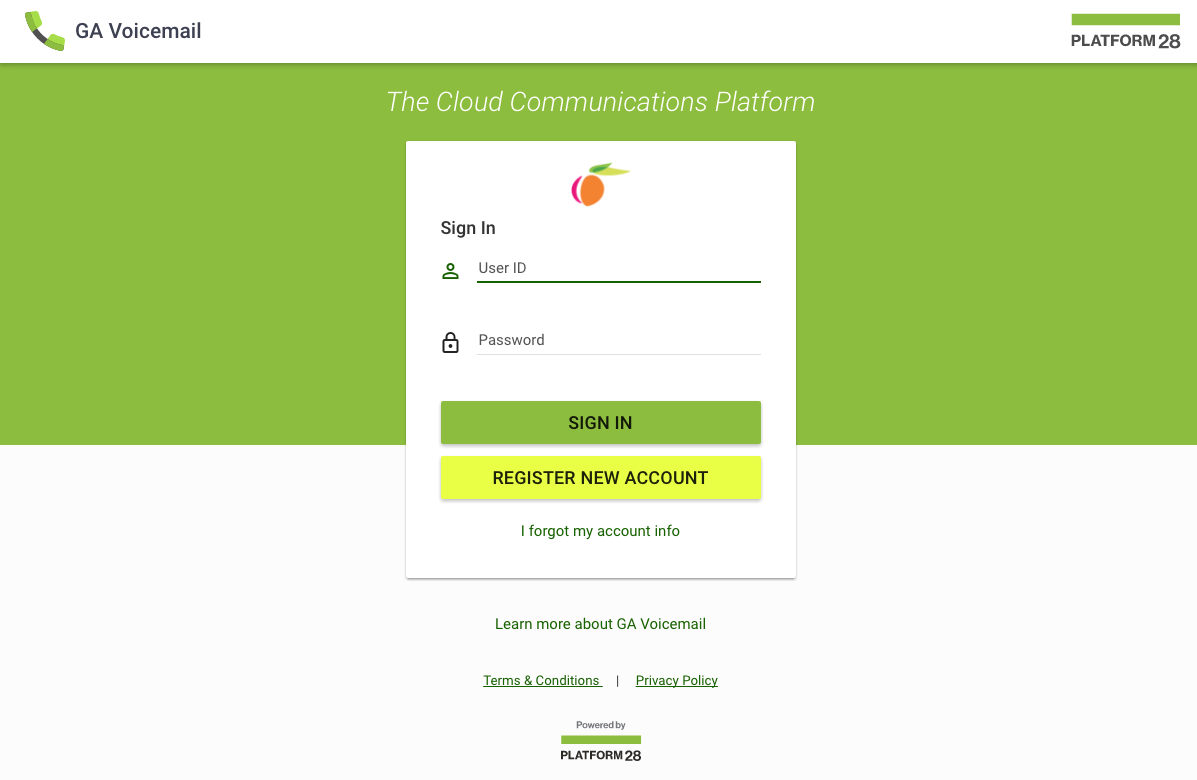
The account is now registered for use with Platform28 GA Voicemail. The User will be redirected to the login page.
Mailbox Navigation
This section will ensure the User is familiar with how to navigate through the mailbox and the options available to them. How to setup some of the options will be discussed later in the guide.
Navigation Panel
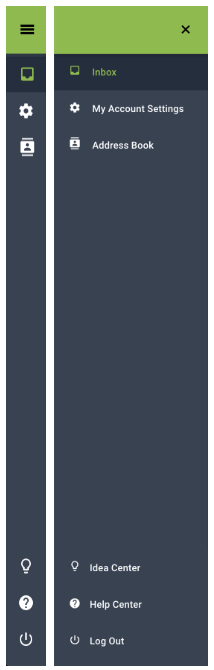
The Navigation Panel is located on the far left hand side of the screen. From here the User can navigate between their Inbox, Account Settings, Address Book, Help Center, and Log Out. At the very top in the green toolbar, there is a hamburger icon. This icon is used to expand the Navigation Panel. The collapsed menu will show icons only, and the expanded menu will show icons and titles. The menu option currently in use will always be highlighted in green. When expanded, the hamburger icon changes to an X which will collapse the menu when clicked.
Inbox
Inbox
When logging in, the Inbox is the default view for all Users. This is where voicemails and faxes will be located when received. There are five (5) view options for the Inbox:
- Inbox - All
- Shows the User all Voicemails and Faxes currently in the Inbox
- Voicemails
- Shows the User only Voicemails
- Faxes
- Shows the User only Faxes
- Sent
- Shows the User all messages Sent via the system
- Trash
- Shows the User all deleted items
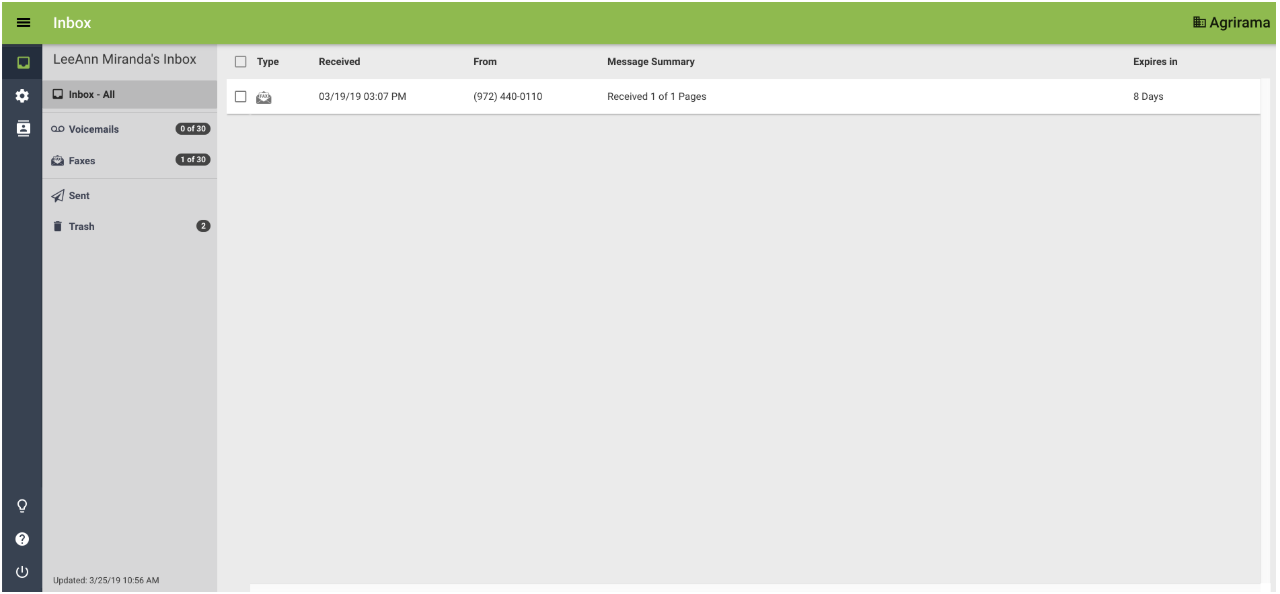
Most GAVM mailbox messages will remain in the Inbox for a maximum of fourteen (14) days unless they are saved. If deleted, messages will be stored in the Trash folder for a period of ninety (90) days before being permanently deleted. If a message is manually deleted from the Trash folder, it is then permanently deleted and cannot be restored. The organization name can be found on the top right of the header with the last updated date and time located in the footer of the Inbox navigation pane.
Account Settings
Account settings are used to customer each mailbox. This section will provide a walk through of the basic options.
General
The default start page for Account Settings is the General tab. On this tab the User can see their Account Overview, the last time they logged in, and other personal information. Updates can be made to the User account information from this page. Notice there is a separate access phone number for the mailbox under My VM Access Number. This is the number used to dial into voicemail from another telephone.
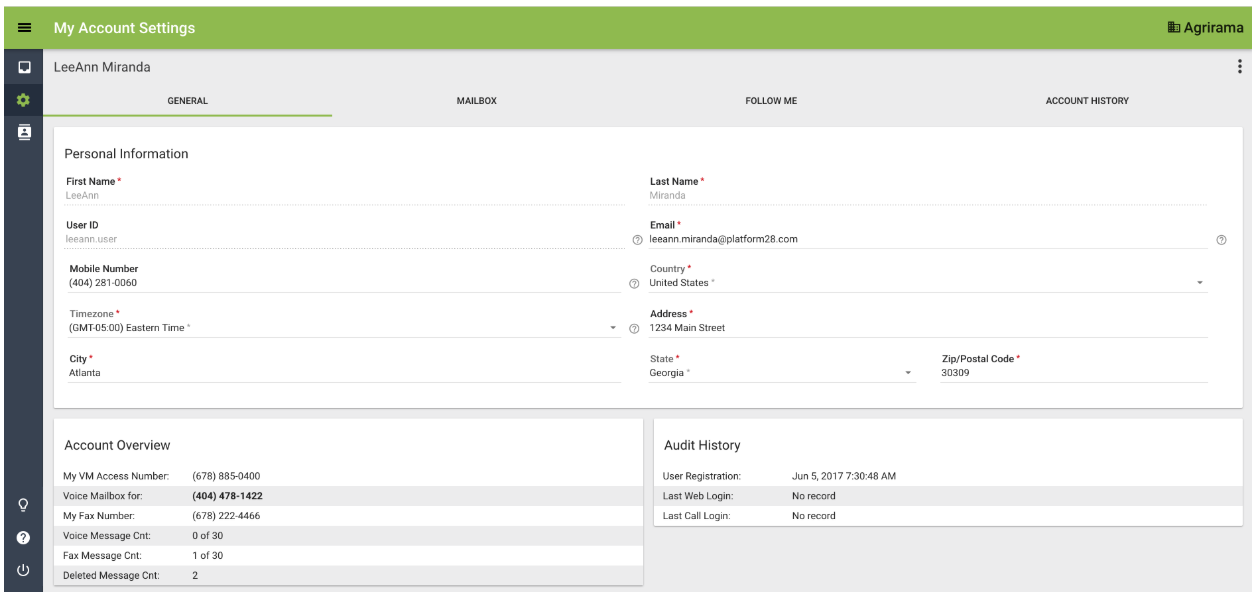
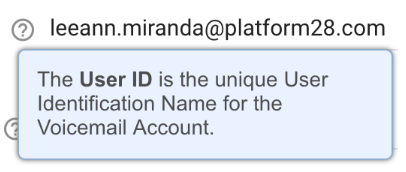
Note: Throughout the site there are small question marks next to some items. The question mark is a tool tip. Hover over the question mark with the cursor and a tool tip will appear. Move the cursor off of the tool tip to close it.
Mailbox
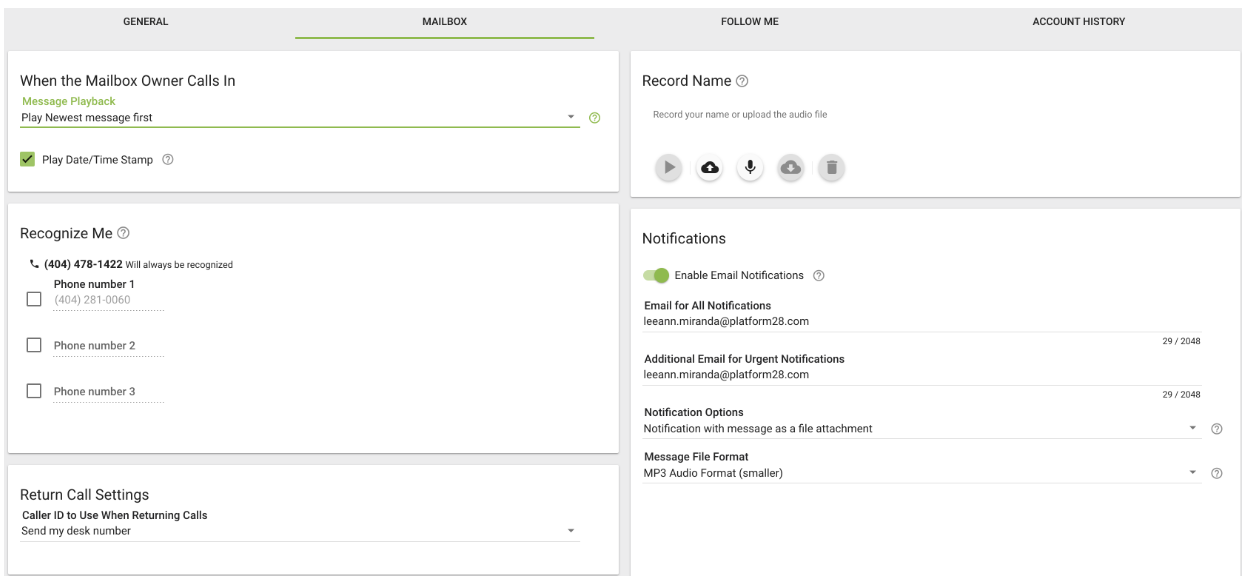
There are several options on the Mailbox tab the User can use to fully customize their mailbox.
Message Playback
The User can determine which message they hear first when calling into their Voicemail box. Within the drop down they can choose to either play the newest or the oldest messages first. Check the box provided next to Play Date/Time Stamp in order to hear the date/time of each message.
Record Name
The User should record their name in order to ensure any callers reaching their voicemail is hearing the correct pronunciation of their name. If default greetings are used versus recording a personal greeting, the system will use the recorded name to identify the User for callers. If a name is not pre-recorded, the system will generate the recorded name using text-to-speech.
Recognize Me
Recognize Me is used so the mailbox owner can call in from up to three (3) alternative numbers and will still be recognized as the mailbox owner. Enter the alternate numbers in the spaces provided while also checking the box to the left of the number.
Notifications
Notifications can be enabled so the mailbox owner will receive emails when a voicemail has been received. The User can opt to just be notified, ensure a link to the message is provided in the email, or the voicemail can be attached to the notification as either an MP3 or .wav file.
Returned Calls
When returning a missed call, the User can either block their Caller ID, send their desk number, or send the number they are calling from.

Fax Settings
If the User’s account is enabled for Fax, the Enable Inbound Fax option will be selectable. When enabled the User is open to receiving inbound faxes. When disabled, inbound faxes will be blocked.
Message Transcription
Message transcription will be enabled in future releases and will provide a transcription of voicemails within the voicemail email notifications.
Greeting Sets
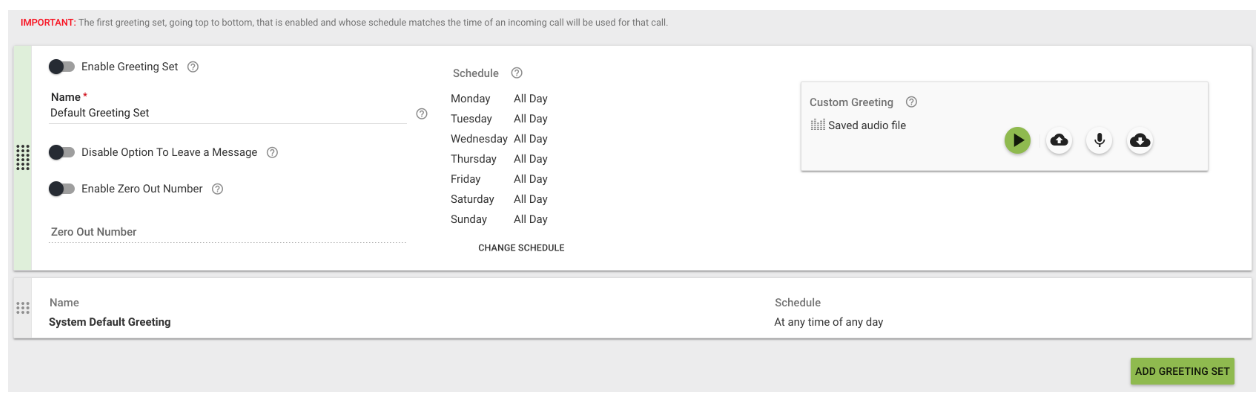
The outgoing greeting can be completely customized. Multiple greetings can be setup and scheduled so different greetings play at different times. To start, make sure to enable the Greeting Set by moving the slider to the right. Name the greeting with something that can easily be identified in the event more than one greeting is being configured. For example, there could be one greeting for during office hours and one for after office hours. To create multiple scheduled greetings, click on Add Greeting Set.
Record a Greeting
A greeting can either be uploaded as a .wav file no larger than 5MB, or recorded directly into the system. To record a personal greeting directly into the system, click on the microphone button. Recording capabilities must be enabled on the workstation and use either a headset or standalone microphone so audio is captured clearly with limited background interference.
Click on the microphone icon to begin recording.

Click on Start Recording
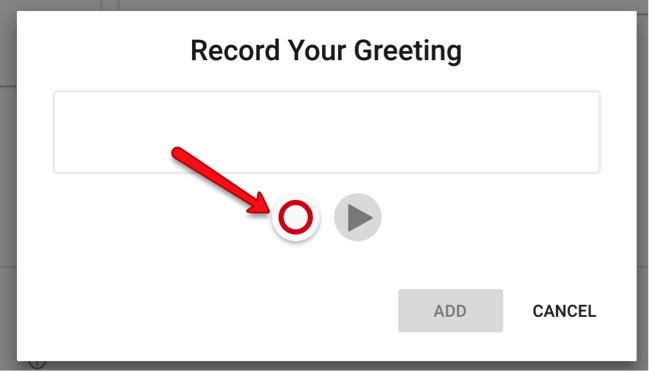
As the audio is being recorded, the sound meter will populate in the screen which will depict the volume at which it is recording the voice.
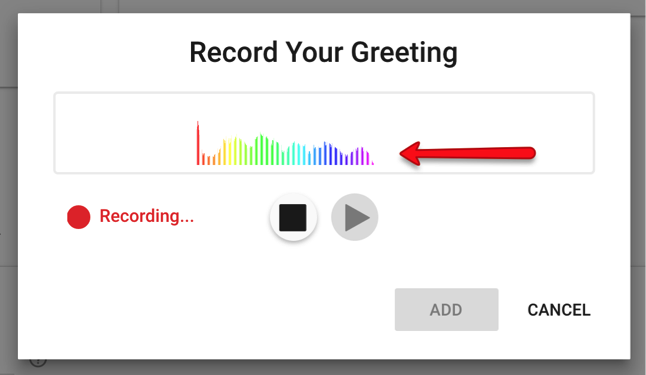
When finished speaking, click the Stop button.
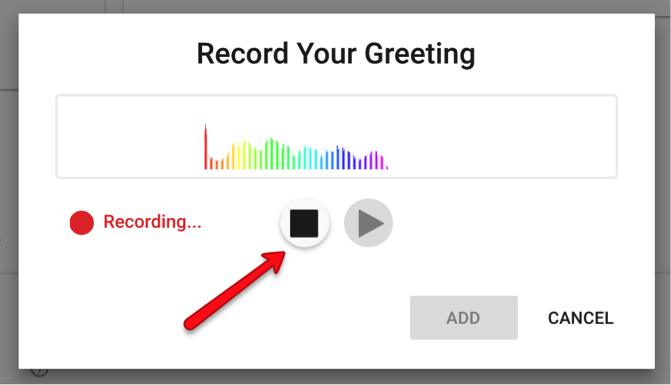
The system recorded the message, and it can be listened to by pressing the Play button.
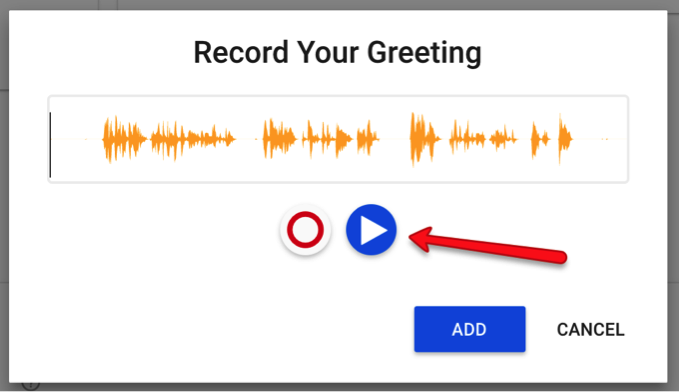
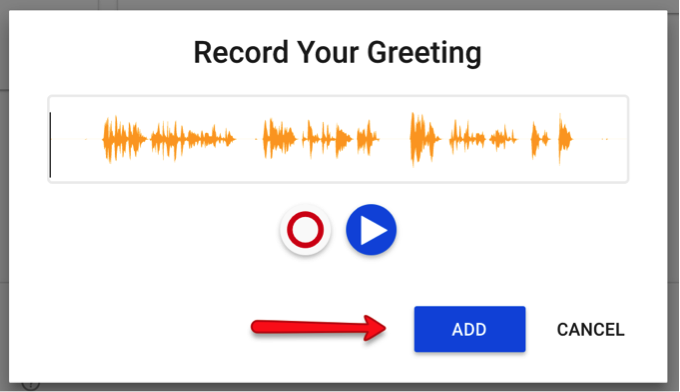
If happy with the recording, press the ADD button.
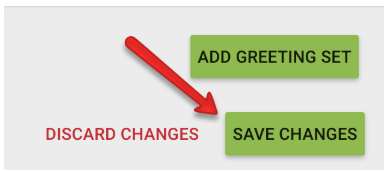
In order to put the greeting set in place, click on the Save Changes button.
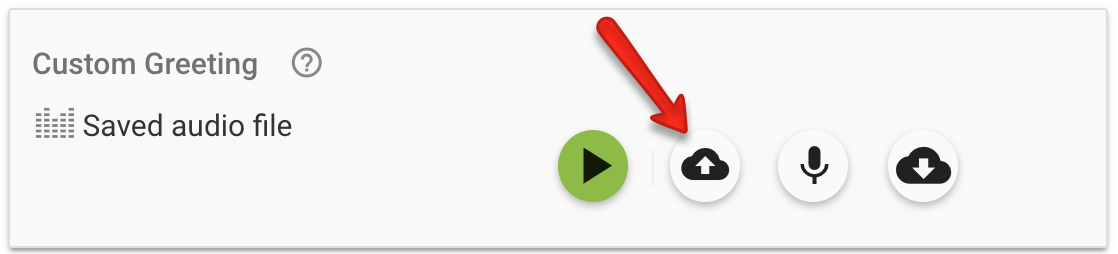
Upload a Greeting
To upload a pre-recorded greeting from the workstation, click on the Upload Greeting button.
Locate the desired file on the local machine. Click Open.

The file has been uploaded. To put the recorded greeting in place, click Save Changes.

Download a Greeting
Greetings can be downloaded to the computer. It’s always a good idea to have these files downloaded into a local folder in the event they are needed in the future.
Click on the Download Greeting button
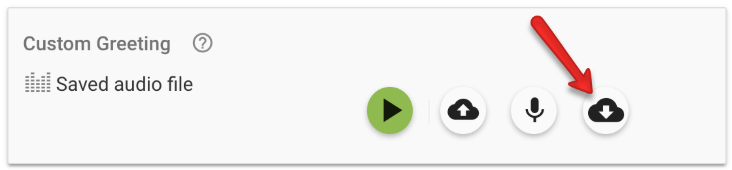
The greeting will open on a separate tab within the browser and will begin playing. Click on the three (3) dots to the right of the greeting.
Click Download

Name and save the file to the local machine in the desired location.

Follow Me
Follow Me is allows the User to configure rules within the system so calls will be directed per the Follow Me Rules. To configure Follow Me, click on Set Up Follow Me Rules.
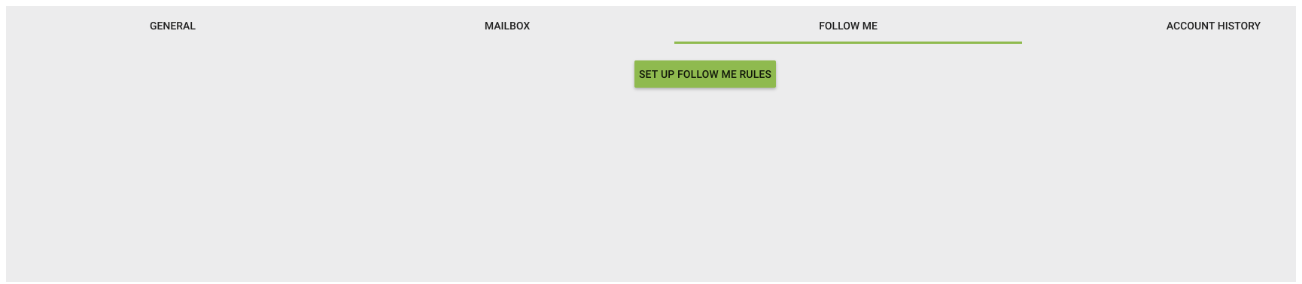
Update the options as desired. Each Follow Me Rule should be named. For instance, maybe there is a rule for Weekdays and a different one for Weekends. Each of these would be a separate rule and named accordingly.
Each drop down provides different options. The Follow Me rules can be configured so they are only active on a specific schedule. A ringdown can also be set so the calls are sent to alternate numbers and will ring each number the specified number of seconds. To save the Follow Me Rule(s), click the Save Changes button once configured.

Account History
The system keeps track of all actions on the account and maintains a history that can be viewed at anytime by the User.

Address Book
The address book is where contacts can be stored. Click on Create Address Book and begin adding contacts by filling out the form provided when clicking on the green Add Contact button.

Help Center
The Help Center is used to submit tickets and find items such as the product Release Notes and the Knowledge Base.
Checking Voicemail Remotely
If you do not have access to the internet or the GA Voicemail Portal, you can still check your voicemail and manage some of the administrative options by dialing in from a telephone.
Access Steps
- Dial the Voicemail Access Number.
- If dialing in from an unrecognized number, enter the Desk Phone Number followed by the Pound (#) key.
- Once authenticated, the system will greet the User by the Recorded Name and announce the number of Voicemails and Faxes currently in the Inbox.
- Enter the PIN followed by the pound (#) key to continue to additional options.
- Press 1 to Listen to New Messages
- Press 2 to Listen to Saved Messages
- Press 3 to Listen to Recently Deleted Messages
- Press 4 to Listen to Personal Options
Note: If there are no New, Saved, or Deleted Voicemails, those options will not be heard when accessing the voicemail box.
Personal Options
- Press 1 for Greeting Options
- Press 2 for Recorded Name
- Press 3 for PIN
Greeting Options
- Press 2 to Record a new Greeting
- Press * to Return to the Previous Menu
Recorded Name Options
The User will be prompted to record their name and press the pound (#) key when completed.
- Press 1 to Save the new recording
- Press 2 to Re-record the name
- Press 3 to Play the recording
PIN Options
The User will be prompted to enter a new PIN then press the pound (#) key. The pin must be greater than four (4) digits, but less than ten (10) digits.
- Press 1 to Save the new PIN
- Press 2 to Enter a different PIN
Comments
0 comments
Article is closed for comments.